

Vaping is a popular alternative to smoking, but maintaining your vape device is crucial to ensure its performance, flavor, and hygiene. One of the most important aspects of vape maintenance is cleaning your vape tank regularly. Over time, residue from e-liquids, especially those high in propylene glycol (PG) and vegetable glycerin (VG), can build up in the tank, affecting flavor, cloud production, and even your health.
This comprehensive guide will show you how to clean a vape tank properly, step by step, including tips for deep cleaning, dealing with stubborn residue, and maintaining your tank for optimal performance.
Why Should You Clean Your Vape Tank Regularly
Regular vape tank cleaning is essential for every vaper, as it directly impacts flavor, performance, hygiene, cost, and safety. Over time, residue from e-liquids can accumulate in the tank, causing old and new flavors to mix and resulting in unpleasant, muted, or off-putting tastes. A dirty tank can also compromise vapor production, leading to weak hits, uneven wicking, and a shortened coil lifespan, which may force you to replace components more frequently.
From a hygiene perspective, leftover e-liquid and moisture provide a breeding ground for bacteria, mold, and dust, making regular cleaning crucial to maintain a safe vaping environment. In addition to these health and performance benefits, consistent maintenance improves cost efficiency, as well-kept tanks and coils last longer, reducing the need for frequent replacements. Finally, neglecting tank cleanliness can create safety hazards, such as leaks, poor electrical connections, and, in extreme cases, short circuits that can damage your device or mod.
Whether you are using sub-ohm tanks like the SMOK TFV series, flavor-focused setups such as the Aspire Cleito series, robust tanks like the Uwell Crown series, or cloud-chasing options like the GeekVape Falcon series, regular cleaning ensures a consistent, safe, and enjoyable vaping experience while preserving the flavor integrity of every e-liquid you use.
Tools and Supplies for Vape Tank Cleaning
Before you begin the vape tank cleaning process, it’s important to gather all the necessary tools and supplies to ensure the process is smooth, thorough, and efficient. You’ll need warm or hot water as the base for rinsing and soaking, along with dish soap or a mild detergent to help break down sticky e-liquid residue.
For a deeper clean, particularly when dealing with stubborn buildup, isopropyl alcohol, ethanol, or even vodka can be used safely on most metal and glass components. Ingredients like vinegar or baking soda are also effective for tackling persistent gunk or mineral deposits. To reach tight corners and clean delicate areas, have cotton swabs or Q-tips on hand, while paper towels or a microfiber cloth are ideal for drying and wiping down parts. A small bowl or basin is useful for soaking components, and tweezers can help handle tiny parts or O-rings without causing damage.
For those who want professional-level results, an ultrasonic cleaner can provide a deep, thorough clean, while protective gloves are recommended to keep your hands safe from prolonged exposure to cleaning solutions. Having all of these supplies ready beforehand not only makes the cleaning process more organized but also ensures that every component of your tank receives proper attention for optimal performance and hygiene.

Step-by-Step Vape Tank Cleaning Process
Cleaning a vape tank properly requires careful disassembly, attention to detail, and patience. Following a thorough cleaning routine not only ensures a better flavor but also prolongs the lifespan of your tank and coil. Here’s a complete guide to cleaning your vape tank step by step:
Step 1: Disassemble the Tank
The first step is to remove the tank from your mod or battery to ensure safety during cleaning. Carefully unscrew all detachable parts, including the mouthpiece or drip tip, top cap, glass tube, coil head, and base section. Pay close attention to O-rings and seals, removing them gently to prevent tearing or deformation.
Fully disassembling the tank allows you to reach every nook and cranny, ensuring no residue is left behind. This step is crucial for effective cleaning, especially if you’re dealing with sticky VG-rich e-liquids or residue from multiple flavor changes.
Step 2: Rinse with Warm Water
After disassembly, rinse each part under warm running water, except for the coil if it contains a wick that may get damaged. The warm water helps to dissolve loose e-liquid residue. For hard-to-reach spots, use a soft brush or cotton swab to gently scrub away visible buildup.
This simple rinse is excellent for weekly maintenance or for tanks that are not heavily used, preventing residue accumulation and maintaining a clean vaping experience.
Step 3: Soak the Components
Next, prepare a soaking solution by filling a bowl or basin with warm water and adding a few drops of dish soap or mild detergent. Immerse the glass tube, metal components, and mouthpiece for 15–30 minutes. This soaking process loosens sticky VG and PG residues, making them easier to clean. For tanks with more stubborn buildup, you can add a small amount of vinegar or baking soda to the solution. Soaking is especially helpful if you have not cleaned the tank in a while or if you are switching between strong-flavored e-liquids.
Step 4: Clean the Coil and Wick
The coil is the heart of your tank, but it requires careful cleaning. Coils with heavy gunk or burnt residue may need replacement, as deep cleaning may not restore their original performance. For lightly used coils, you can rinse them briefly under warm water. Avoid soaking organic cotton wicks for too long, as prolonged exposure to water can compromise flavor and absorption. Use a cotton swab or Q-tip to gently remove residue from the coil threads and exterior, ensuring the coil is free of excess e-liquid or buildup.
Step 5: Rinse and Remove Soap
After soaking, rinse all components thoroughly under warm running water to remove soap, vinegar, or baking soda residues. Leftover cleaning agents can negatively impact the flavor of your e-liquid and may even irritate your throat during vaping. Be meticulous in this step to ensure no cleaning solution remains on the glass, metal, or plastic parts.
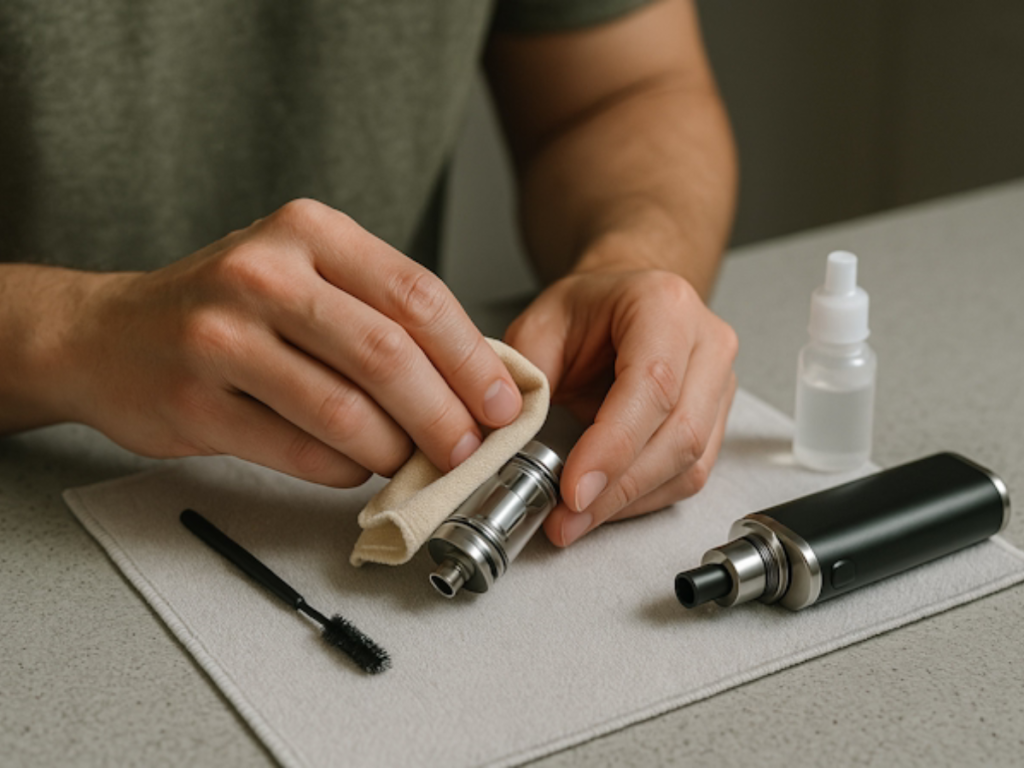
Step 6: Dry the Components
Once rinsed, shake off excess water from all components. Use a microfiber cloth or paper towel to gently pat each part dry. Allow the components to air dry overnight in a dust-free environment, especially around sensitive areas like the coil threads and O-rings. Ensuring complete dryness is crucial to prevent leaks, mold growth, and corrosion, and it guarantees that your next vaping session will be clean and flavorful.
Step 7: Reassemble the Tank
After all parts are completely dry, carefully reassemble the tank. Make sure each O-ring and seal is correctly positioned, and screw all components together without over-tightening, which can damage the threads or glass. Reattach the tank to your mod and refill it with your favorite e-liquid. By following this thorough step-by-step cleaning process, you ensure that your vape tank remains hygienic, fully functional, and delivers optimal flavor every time you vape.
Different Cleaning Methods for Vape Tanks
The method you choose for cleaning your vape tank depends on the level of dirtiness, the type of e-liquid you use, and whether you are performing a basic or thorough cleaning. Here are several effective methods that cater to different cleaning needs:
Water Rinse
If you’re looking for a quick and effortless way to freshen up your vape tank, a simple water rinse does the trick. Running the parts (except the coil) under warm water helps wash away light e-liquid traces and prevents flavors from lingering when switching between juices. This approach isn’t intended for heavy buildup, but it works well as a basic maintenance routine to keep your tank clean and ready for use.
Soap and Warm Water
For a more thorough cleaning, using dish soap and warm water can dissolve sticky residues, particularly from VG-rich e-liquids that tend to coat the glass and metal parts. Soak the components in soapy water for 15–30 minutes, and use a soft brush or cotton swab to gently scrub hard-to-reach areas. This approach removes mild buildup and ensures your tank is refreshed, making it perfect for regular maintenance or after extended use.
Alcohol or Vodka Soak
If your tank has stubborn residue that water and soap cannot remove, an alcohol or vodka soak can provide a deep clean. Use isopropyl alcohol, ethanol, or vodka to soak metal and glass components (avoid soaking plastic parts to prevent damage) for 10–15 minutes. After soaking, rinse thoroughly with warm water to remove any alcohol taste or odor. This method is particularly effective for removing sticky deposits, old e-liquid gunk, or residual flavors.
Vinegar or Baking Soda Solution
For stubborn buildup or mineral deposits, a vinegar or baking soda solution can be very effective. Mix a small amount of vinegar or baking soda with warm water and soak the tank’s glass and metal parts for 15–30 minutes. The mild acidic nature of vinegar or the gentle abrasiveness of baking soda helps break down hardened gunk. After soaking, rinse thoroughly under warm running water to ensure no residue remains.
Ultrasonic Cleaner
For serious vapers or those seeking professional-level cleaning, an ultrasonic cleaner provides a highly effective deep clean. Place non-coil components of your tank into the cleaner with water or alcohol. The ultrasonic vibrations remove stubborn buildup and sanitize hard-to-reach areas, leaving your tank spotless. This method is ideal for vapers who use thick VG e-liquids or frequently switch flavors and want their tank to feel like new.
By understanding and using these cleaning methods appropriately, you can maintain a clean, hygienic tank, improve flavor, and prolong the life of your components. Choosing the right method depends on your cleaning goals—whether it’s a quick weekly rinse or a deep, professional-level clean.
How to Clean Stubborn Residue and Buildup
For tanks with stubborn residue or sticky VG deposits: soak components in hot water and dish soap for 30–60 minutes. Use cotton swabs, a soft toothbrush, or a pipe cleaner to reach tight areas. For metal parts, a brief alcohol soak or ultrasonic cleaner session can remove hardened gunk. Avoid using excessive force to prevent scratches or damage to O-rings. This ensures thorough flavor cleaning and prevents old e-liquid from affecting new flavors.
Drying and Reassembling Your Vape Tank
Proper drying is critical to avoid leaks and maintain performance. Shake off excess water and pat down parts with a microfiber cloth or paper towels. Air-dry all components overnight in a dust-free environment. Before reassembly, inspect O-rings, seals, and threads to ensure they are intact. Assemble the tank carefully, making sure every part fits snugly to maintain vape tank hygiene and leak prevention.
When and How Often to Clean Your Vape Tank
The frequency of cleaning depends on usage, e-liquid type, and vaping style. Regular vapers can stick to weekly cleaning, while those switching flavors should clean the tank each time to prevent mixing. Tanks using thick VG e-liquids may need more frequent cleaning. Performing a deep clean every 2–4 weeks ensures optimal hygiene, flavor preservation, and smooth performance. Maintaining this routine prolongs the life of both your tank and coil.
Vape Tank Cleaning Safety Tips and Warnings
While cleaning, keep safety in mind:
- Avoid harsh chemicals; use only isopropyl alcohol or vodka for deep cleaning.
- Protect the coil and wick; over-soaking can damage cotton wicks.
- Handle glass carefully to prevent cracks or scratches.
- Always remove the tank from the battery/mod before cleaning.
- Avoid boiling water, which can crack glass components.
- Check all O-rings and seals before reassembly to prevent leaks.
Following these precautions keeps both you and your device safe.
Additional Vape Tank Maintenance Tips
To maximize your vaping experience:
- Rotate flavors carefully and clean the tank when switching.
- Inspect O-rings and seals regularly and replace them if worn.
- Replace the coil when flavor diminishes or after heavy use.
- Wipe the exterior with a microfiber cloth for quick maintenance.
- Avoid leaving e-liquid in a dirty tank for long periods, as residue can harden and affect flavor.
Regular maintenance enhances device performance, longevity, and ensures every vape is flavorful and hygienic.
Conclusion
Knowing how to clean a vape tank properly is essential for every vaper. Regular cleaning ensures optimal flavor, hygiene, and device performance. By following this step-by-step vape tank cleaning guide, using appropriate tools and cleaning methods, and maintaining a consistent cleaning schedule, you can enjoy a smooth and flavorful vaping experience while extending the lifespan of your tank and coils.
From simple weekly rinses to deep cleaning with alcohol or ultrasonic cleaners, there are multiple methods suited to your vaping style. Remember, consistent vape tank hygiene maintenance not only enhances flavor but also ensures your device remains safe, efficient, and long-lasting.
Start your vape tank cleaning routine today and experience the difference in flavor, cloud production, and overall vaping enjoyment.
